Add vCenter Attributes to vROps vCenter Objects using Custom Properties and PowerCLI
Adding custom properties to vROps objects is something that can come in super handy but it’s not extremely straightforward how to do it. The vROps API makes it possible using REST, but for Winbros like myself, PowerCLI provides a way as well. A more detailed walkthrough is available on the VMware blog site.
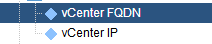
The sky is pretty much the limit on why you would want to add custom properties to a vROps object, but one case I ran into was that I wanted to know the FQDN and IP address of the vCenters that are added to vROps. Maybe your vCenters appear in vROps using their FQDN already or your naming convention is easy to remember, so you don’t have this problem, but in my environment the vCenters have friendly names in order to make reporting easier for the end users and our naming convention is pretty generic. As a result, our vCenters are added to vROps as “New York vCenter” or “Chicago vCenter,” and sometimes I’d really just like to know the FQDN or IP in order to log into the vSphere client or troubleshoot a connectivity problem. Right now I have a spreadsheet but I have to reference it every time and it’s annoying and I hate it. By adding the FQDN and IP as custom properties, I can quickly go to the vCenter object, click on All Metrics, and then see what they are.
List your vCenters and Their Attributes
The first step here is to get a list of vCenters so you know you aren’t missing anything (which I do, often, because I’m impatient) and so you know exactly what the object name is. This is easy using PowerCLI and the vROps plugin:
$creds = Get-Credential -Message "User name (without domain) and password"
$vrops = Connect-OMServer <vrops-server> -AuthSource "Your Domain"  -Credential $creds
$vclist = Get-OMResource -ResourceKind "VMwareAdapter Instance" | select Name
$vclist | export-csv "c:\output\vclist.csv" -NoTypeInformation
When you connect using a domain user, you need you specify AuthSource as the domain name as it appears in the vROps dropdown list when you log in through the web UI. You do not specify the domain in your username credentials (ie domain\user or [email protected]). So now you have a csv of all the vCenters in vROps using their name, like so:
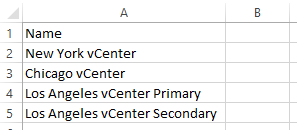
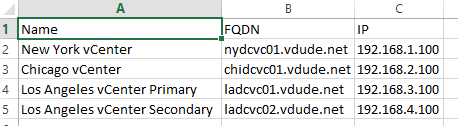
Now that you have your vCenter list, add FQDN and IP columns, then fill those out and save the file as a csv.
Write a function
To summarize the VMware blog post I referenced earlier, there is a vROps API call called AddProperties which requires a contentproperties object. That object is an array of one or more contentproperty objects, which is what contains the custom property name and value. In this example, we will need 2 customproperty objects for each vCenter with the FQDN and IP. You also need a timestamp but I’ll gloss over that.
So in order to make this work, I wrote a function that takes the VC Name, FQDN, and IP as parameters, then creates the required objects and utilizes the API call to add them to the object. Here it is!
function add-vcdetails {
	param($vcname, $vcip, $vcfqdn)

	# Time stamp
	[DateTime]$NowDate = (Get-date)
	[int64]$NowDateEpoc = Get-Date -Date $NowDate.ToUniversalTime() -UFormat %s
	$NowDateEpoc = $NowDateEpoc*1000

	# New objects for API call
	$contentprops = New-Object VMware.VimAutomation.vROps.Views.PropertyContents
	$fqdnprop = New-Object VMware.VimAutomation.vROps.Views.PropertyContent
	$ipprop = New-Object VMware.VimAutomation.vROps.Views.PropertyContent

	# Custom statistic names and timestamps
	$fqdnprop.StatKey = "CustomProperty|vCenter FQDN"
	$fqdnprop.Values = $vcfqdn
	$fqdnprop.Timestamps = $NowDateEpoc
	$ipprop.StatKey = "CustomProperty|vCenter IP"
	$ipprop.Values = $vcip
	$ipprop.Timestamps = $NowDateEpoc

	# Add custom propertiey objects to contentproperties object
	$contentprops.Propertycontent = @($fqdnprop,$ipprop)

	# Get the vROps vCenter resource.  You don't really have to specify ResourceKind but it helps ensure you're getting the vCenter object and not like VM with the same name
	$vcobj = Get-OMResource -Name $vcname -ResourceKind "VMwareAdapter Instance"

	# Add properties to resource
	$vcobj.ExtensionData.AddProperties($contentprops)
	}
So now that we have the function, we can loop through the VC list we created earlier and insert the attributes to each vCenter object:
$vclist = Import-Csv "c:\output\vclist.csv"
foreach ($vc in $vclist){
	add-vcdetails -vcname $vc.Name -vcfqdn $vc.FQDN -vcip $vc.IP
	}
Hit the go button and wait a short while and you’re good to go! The attributes will appear in vROps and be available for Views and Reports or whatever your heart desires.
I realize this is an oddly specific task. I think I’ll do a similar function for creating any arbitrary custom property.